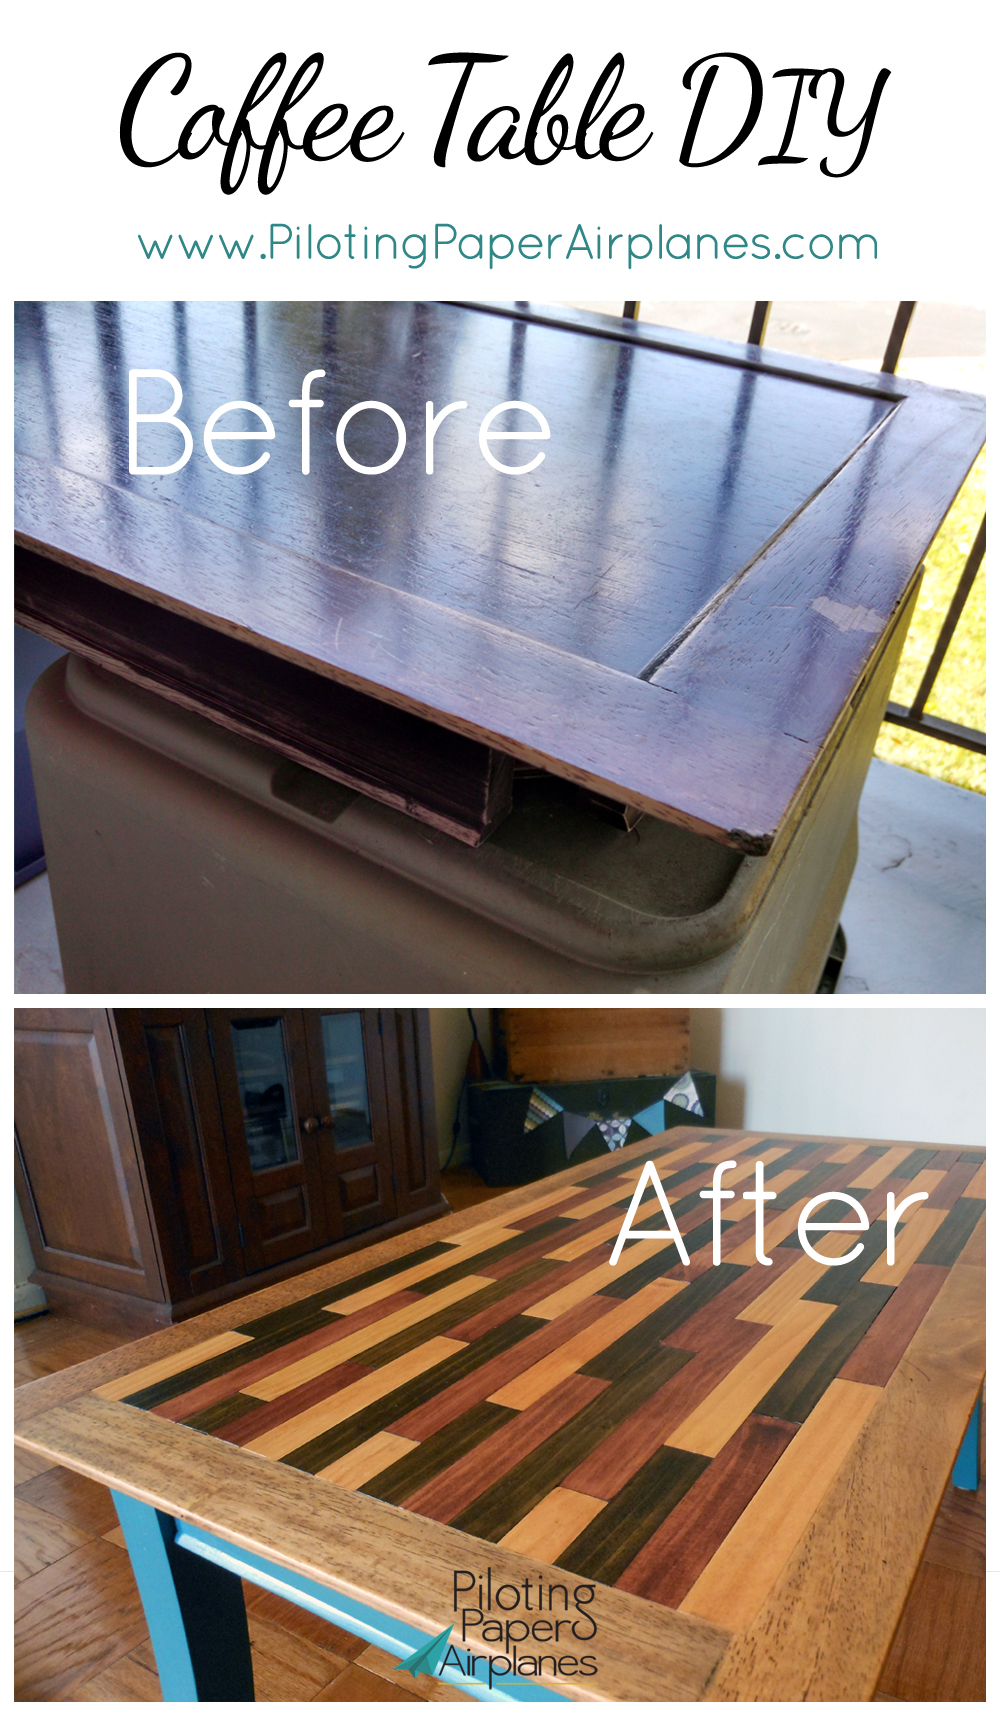
Let me introduce you to the coffee table I’ve hated for years. The table is a great size, but it was worn and I especially hated the lip on top. Yet Jon and I couldn’t find a new table we both liked. So when I stumbled on this cool idea using paint sticks, I knew it was destined to be our latest project. Coffee table diy, here I come!
Because, hey, if it didn’t work or we didn’t like it, I’d still get a new table.
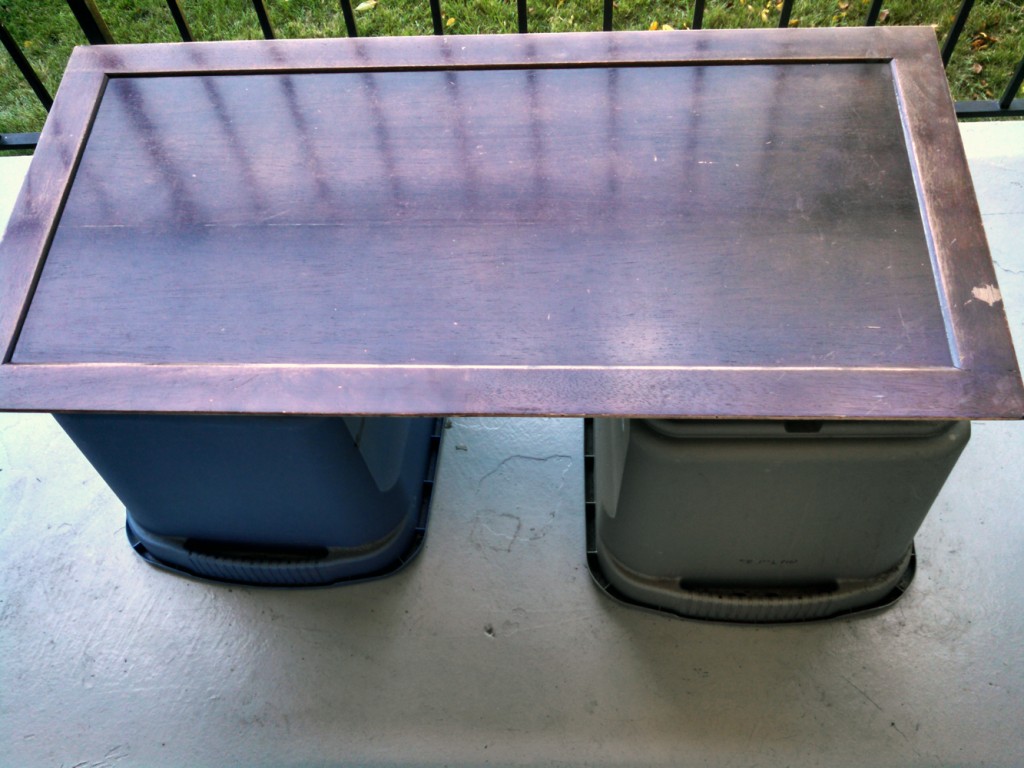
• Worn, battered and just tired. Legs already off for sanding:
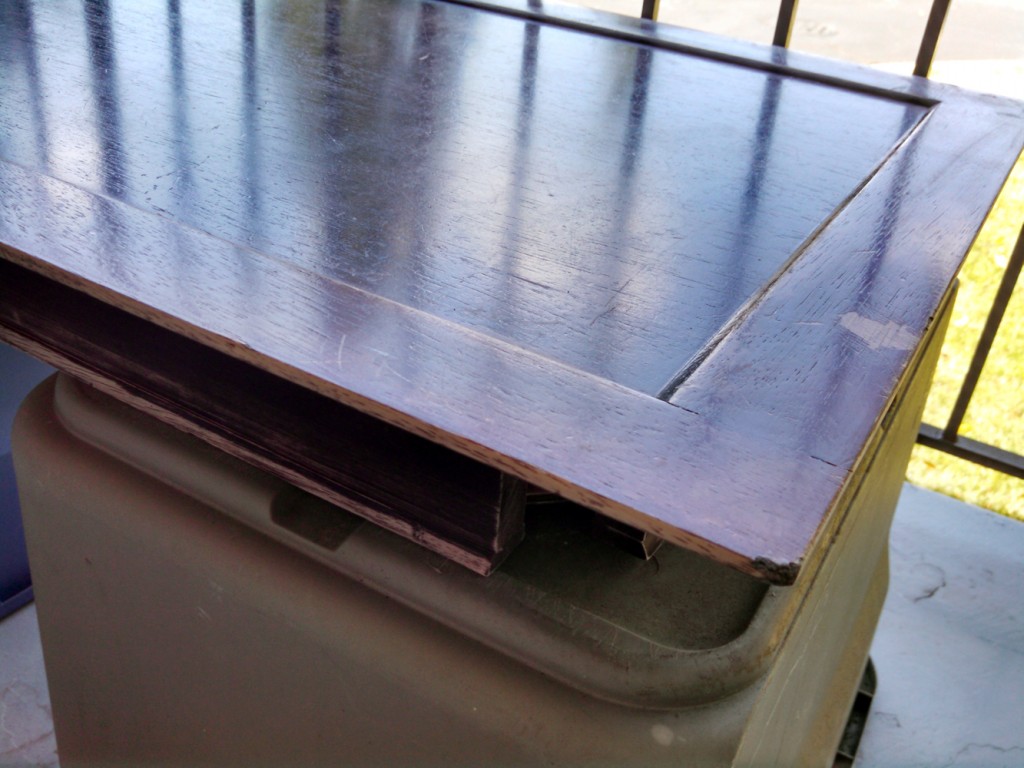
• We experimented with Liquid Sander for the first time. I’m not sure I’ll ever sand something without it again! It stripped the top “glossy” layer completely and softened the stain enough to finish up with sandpaper. No electric sander needed.
The areas I planned to paint received a light sanding while Jon did a more thorough sanding on the areas to be re-stained:
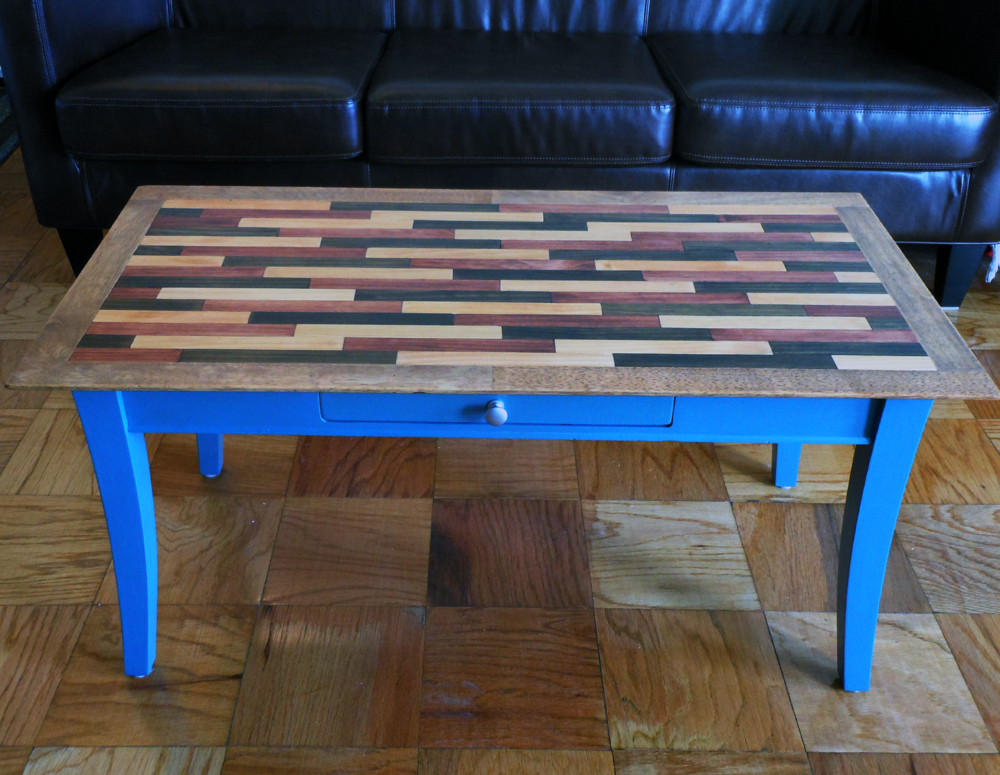
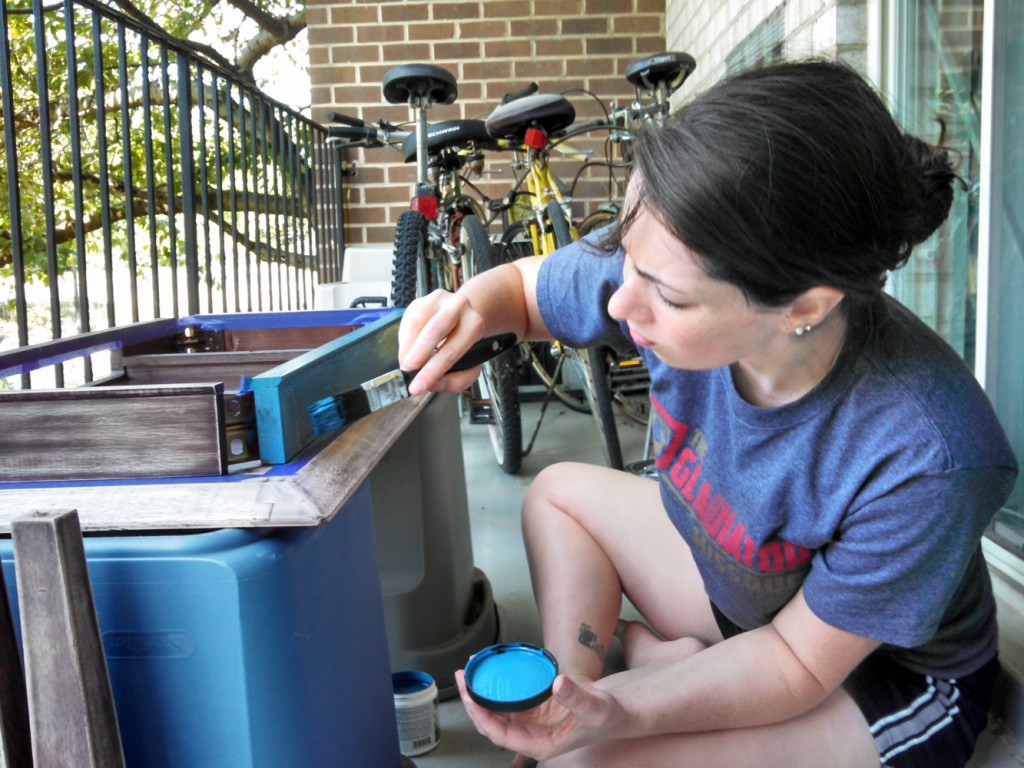
• Painting! (Clearly we didn’t do this in January). We have lots of natural tones in our living space, so I wanted a pop of color on the table. A small sample jar of paint did the trick:
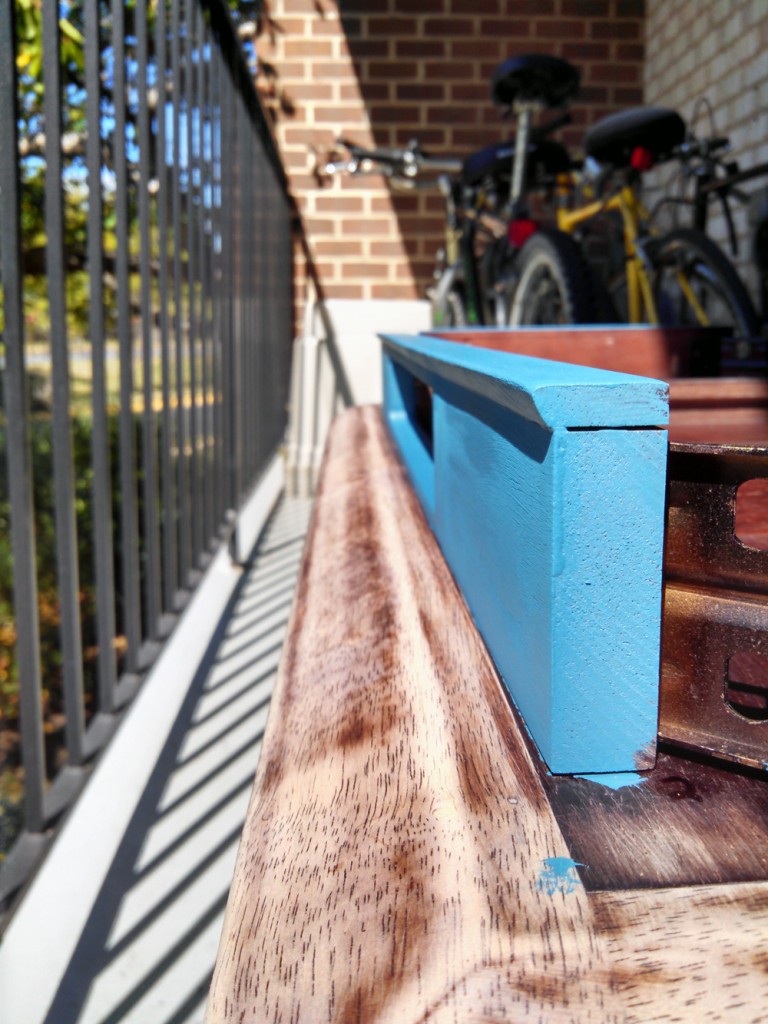
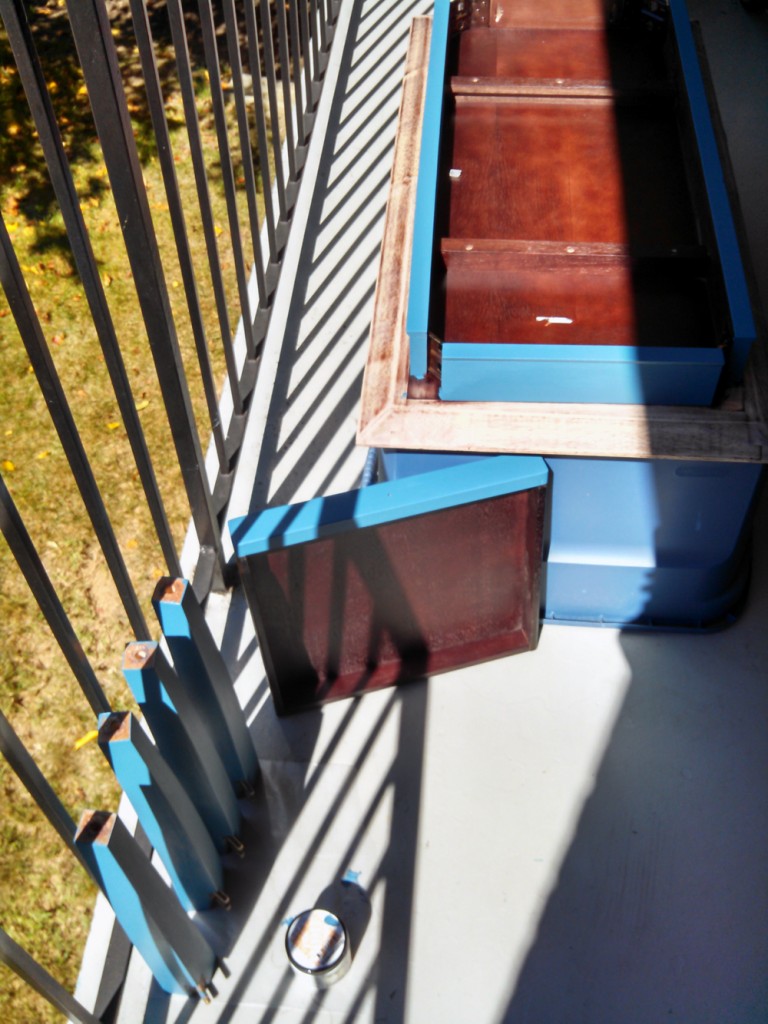
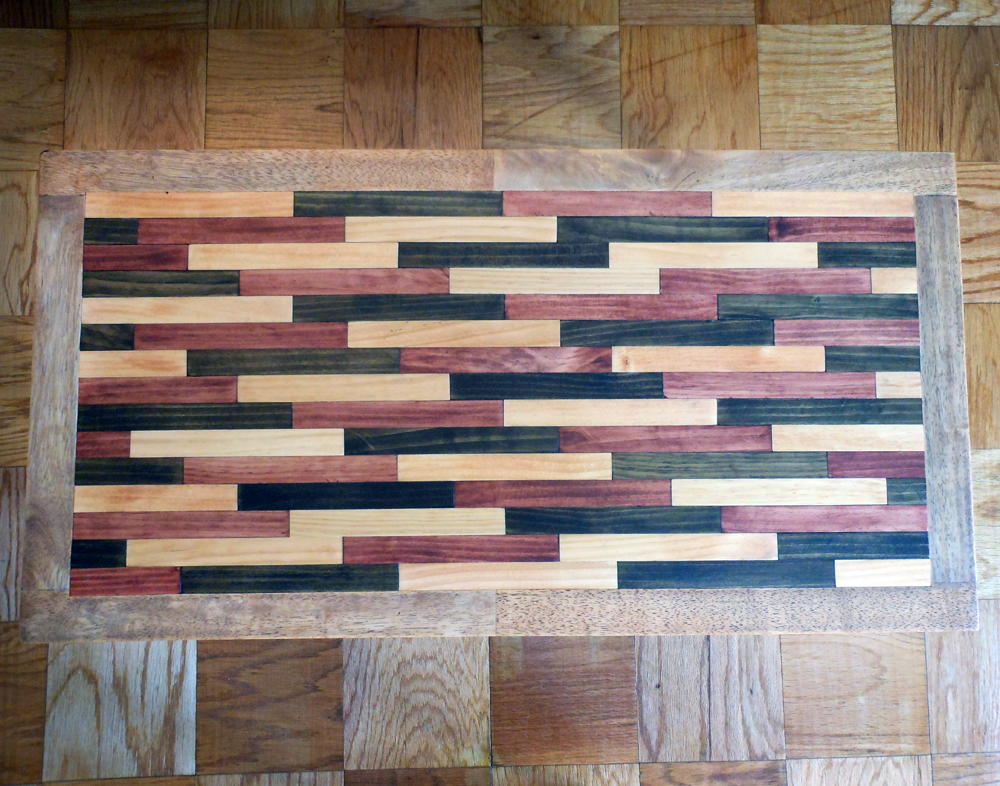
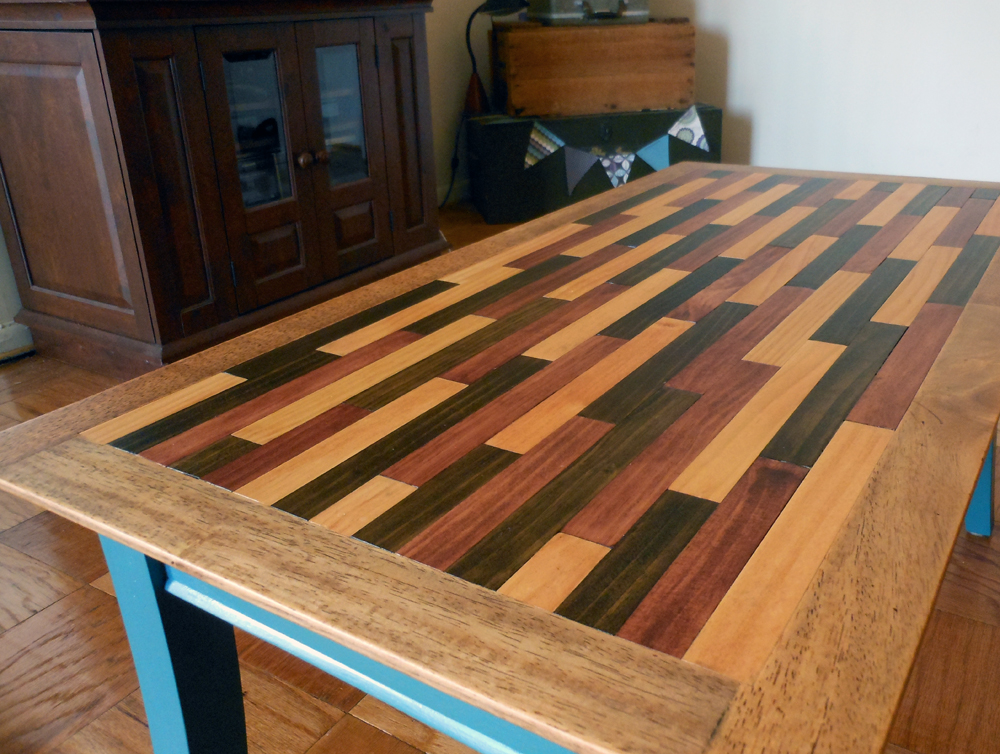
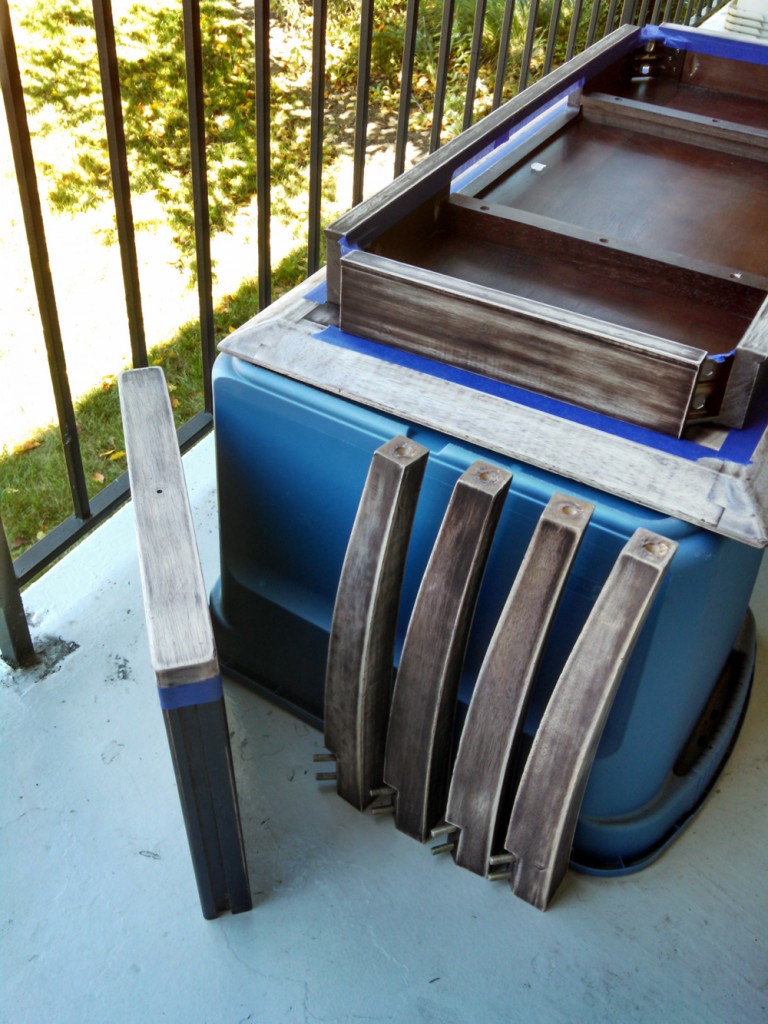
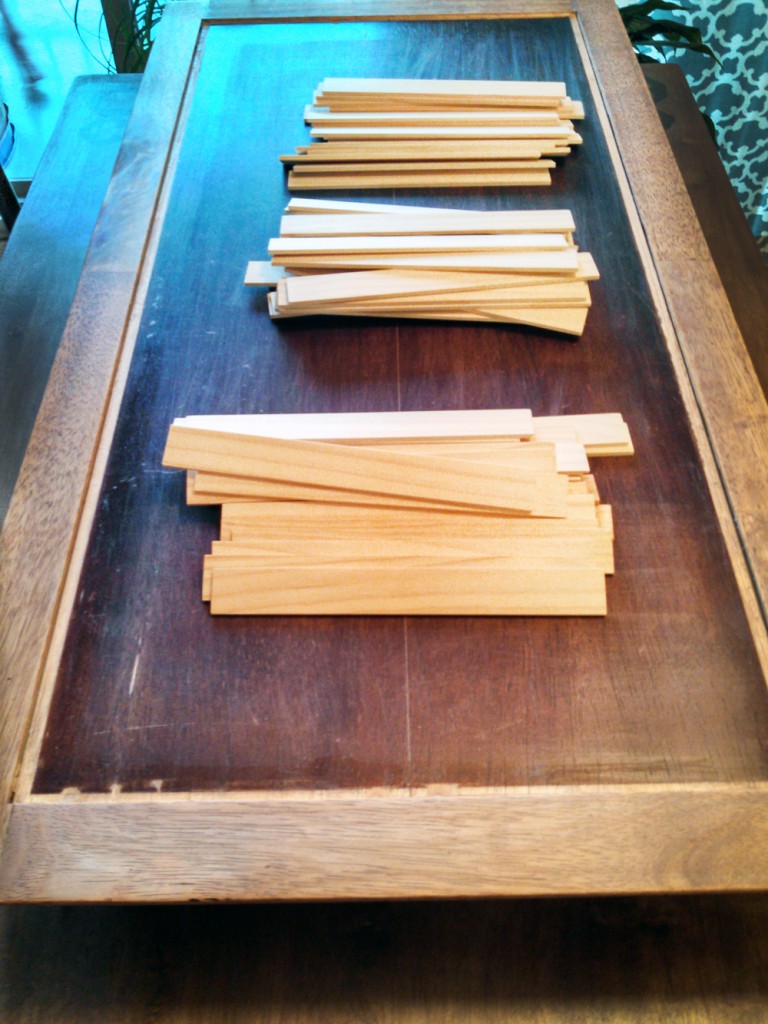
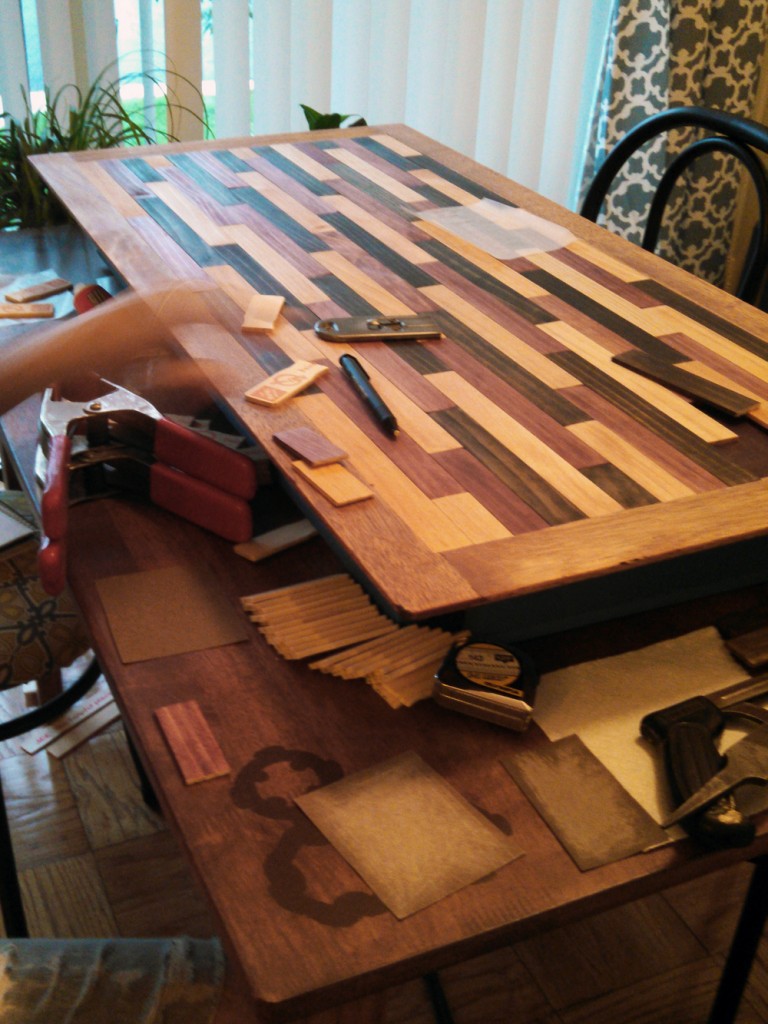
• Building the top. Jon basically took over from here. After four trips to Home Depot collecting enough paint sticks, Jon sawed off the handle ends and gave them a light sand. Then he trimmed out the lip of the table for a perfect fit. I stained the edges of the table top and stained the paint sticks in three different tones (not pictured).
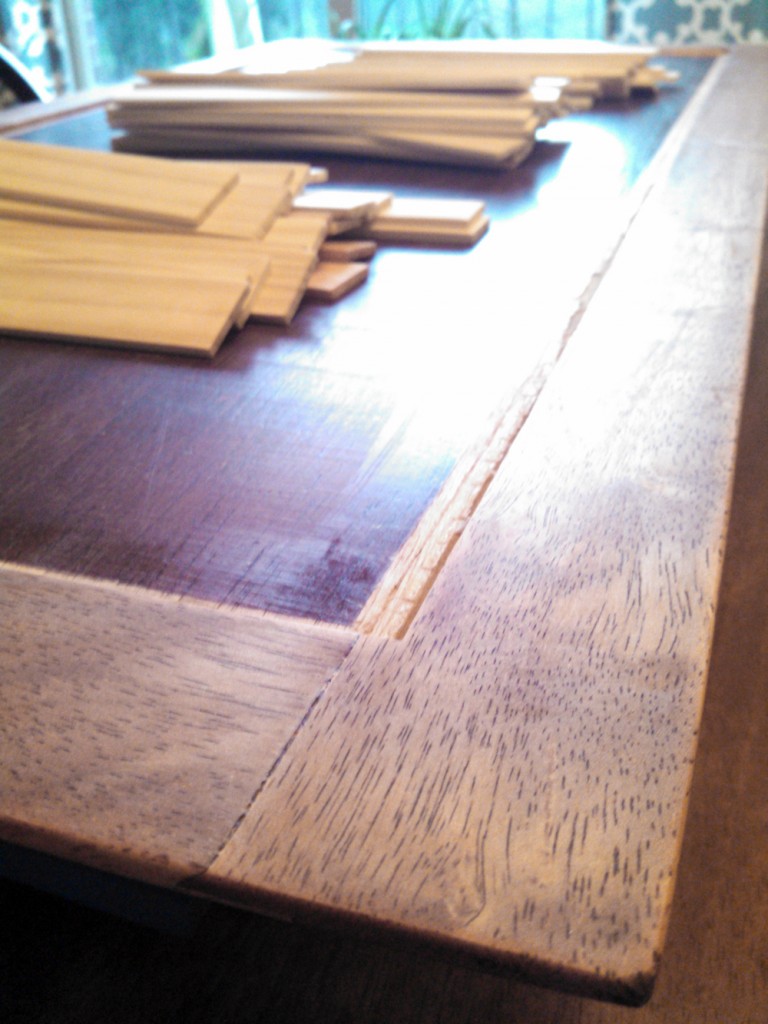
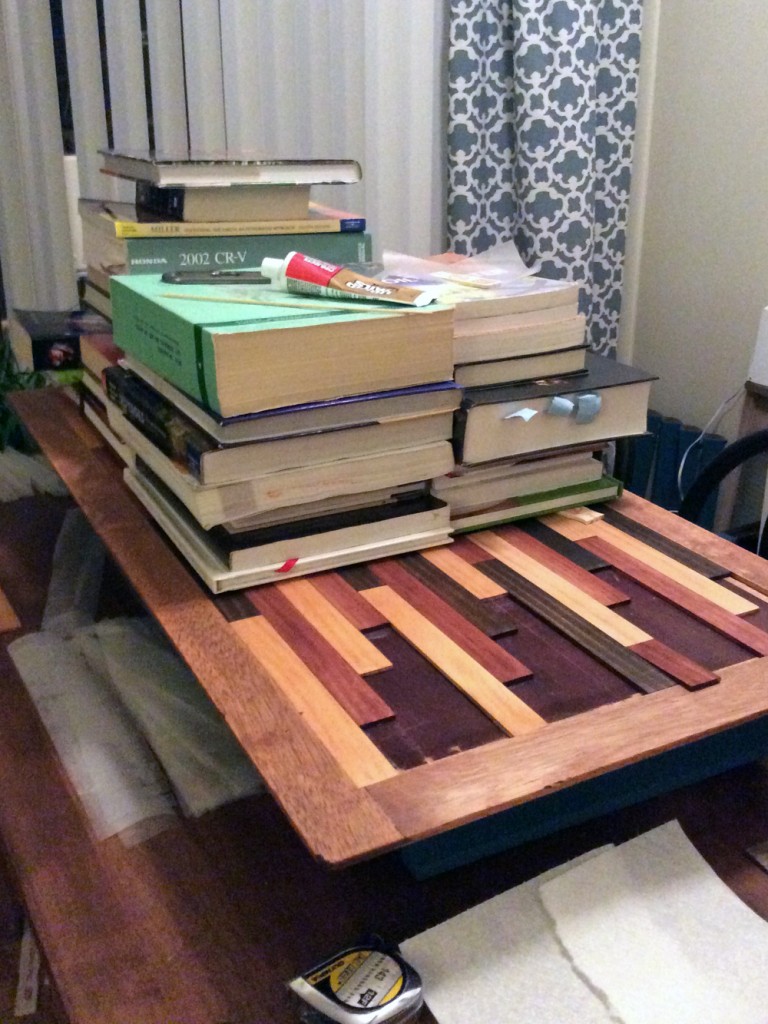
• Next was simply putting a puzzle together. Jon used liquid nails to glue the sticks down in a pattern we laid out ahead of time. We discovered liquid nails tended to warp the sticks a bit, so he glued them in smaller sections and stacked lots of old text books as they dried.
• Done! The last steps were attaching the legs again and applying several coats of polyurethane. The coffee table returned to it’s place and now I LOVE it. I mean really love it. It’s exactly our style: rustic, funky and a project done together.